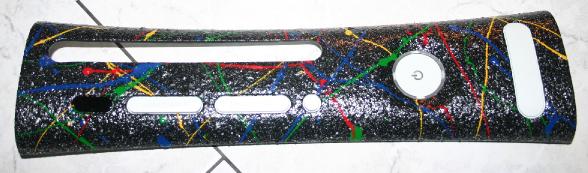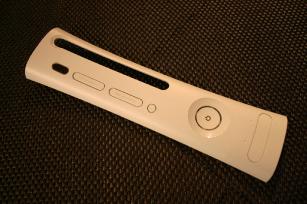
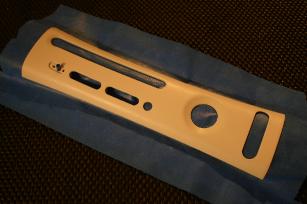
|  | Here is the stock faceplate. |
| | |
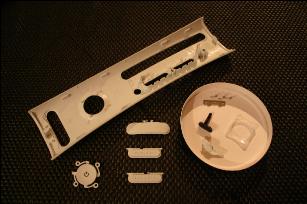
| | Here is an exploded view of the faceplate completely taken apart. All the doors, the IR remote smoked light pipe and the power button have been removed. Take note how they are assembled before taking it apart. Some of the parts are VERY small, like the 3 springs. Don't loose these! =) |
| | |
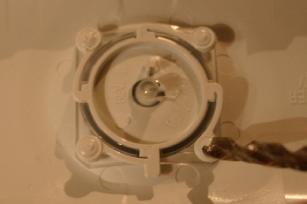
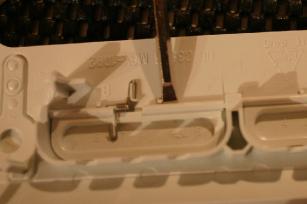
| | The power/connect buttons, IR light pipe and front USB port cover are secured to the faceplate by melted plastic 'rivets'. These rivets are actually plastic posts molded with the faceplate. During assembly, the protruding post ends are melted to secure the stuff in place. Simple enough. Here I'm about to drill the 'rivet' tops to take off the power button and light pipe. Drill just enough off the top to expose the moulded posts that the parts fit on. The button and light pipe is indexed so it'll only go back on one way. |
| | |
| | Here I'm taking off one of the memory card doors. Gently pry in the place shown and remove the door. Take care not to lose that spring and notice how the spring is installed, it installs only one way. The USB door has a spring too but it's held in place by a metal plate. |
| | |
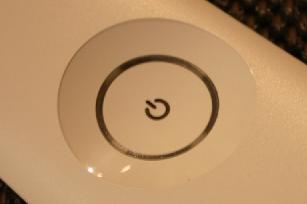
| | Before getting the faceplate primered, there's some prepwork to do. We'r gonna smooth some sharp edges and fill some holes. Here we go... Stock power button: Notice the ridge around the circumference of the button? For this mod, that's gotta go. |
| | |
| | And here it is sanded down. Use some 120ish grit dry sandpaper to get the basic shape down. Then wetsand with 240 grit to get it smoothed out. You'll be 240ing the whole faceplate at some point. Nice and smooth eh? |
| | |
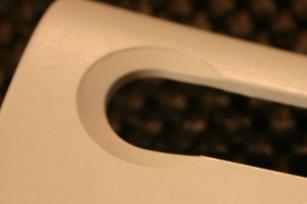
| | Here's the area around the eject button. There's another sharp edge. That's gotta go too. |
| | |
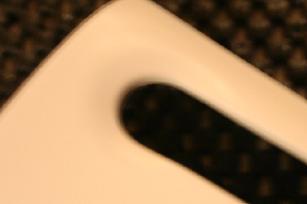
| | The picture is a tad blurry here. Trust me, it's smooth just like the power button ridge. |
| | |
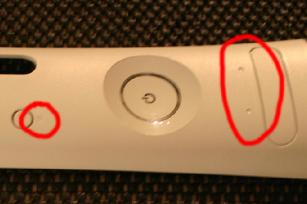
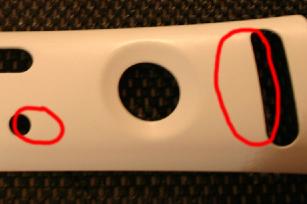
| | OK. On the front of the faceplate there's a moulded 'connect' illustration next to the connect buton. Also, there's 2 dimples which indicate the relative location of the USB ports behind the USB door. Time to fill those in. |
| | |
| | I pulled this off with a drop of epoxy, enough to be JUST higher than the plastic. When almost dried (somewhere between tacky ane rock hard) It was shaven with a razor then lightly sanded. Sand the whole faceplate smooth then primer. Let it dry for a day-ish. |
| | |
| | Now, wetsand the whole thing with 300 grit, dry completly, then mask it up. I masked all the holes from behind. Areas like around the switch and the drive would be cleaned up post-paint, we'll get there. The only spot to really note is the IR light pipe hole on the pictures' far left. I didn't want any paint in there. |
| | |
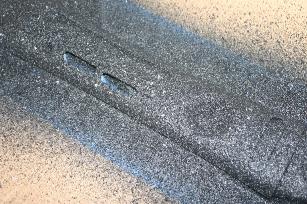
| | Now to shoot the base coat texture. I gave it about 3 coart over the course of a couple of hours. Follow instructions on the can. This was the first time shooting this textured stuff so a test spray was in order before taking it to the project. Take your time shooting the paint. This stuff takes a bit longer to dry than a regular rattle can. |
| | |

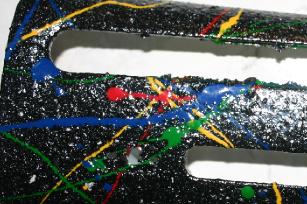
| | After letting the base texture dry for a couple of days next comes the splatter paint. Do one color at a time. Dip a throw-away brush into one of the model paint jars (remember to shake 'em well) and throw the paint at it. It's thick so give it a good wrist-flick. Omm, lay down some newspaper or drop cloth and choose a good spot to throw this paint. It gets messy and there's always a drop or two that'll fly somewhere you don't want. Before you know it you'll track it onto your new hardwood flooring (don't ask). |
| | |
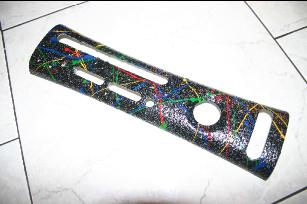
| | After the above splatter, shoot 3 light coats of clear coat, a week of drying (wanted to make sure) remove the masking. If you can, shoot the clear in a warm area. If the ambient air is too cold, you can get bubbles around the edges. |
| | |
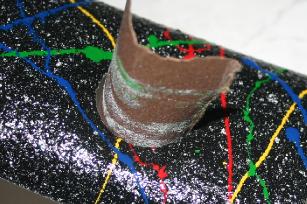
| | Now, this is why we taped the holes from the back rather than around the preimiter of the openings. I wanted to be able to sand away the meniscus of the sprayed paint withought leaving any evidence of it on the visible face. The rough edges seen here around the inside of the drive opening will be going buh-bye. Clean the edge of the IR lightpipe hole with an exacto blade. |
| | |
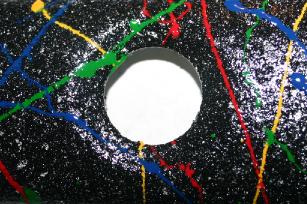
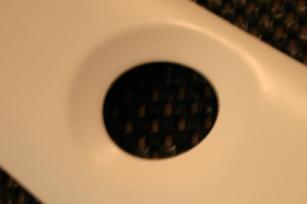
| | Here's the power button opening. The glob of green splatter paint will be leaving us as well. Note that you may only need to do this to the DVD drive and power button openings. There's some adequate clearance for the other items. |
| | |
| | Here's a sample pict of the power button opening clean up. Used the 240 grit dry paper for this. Sand it JUST enough for the unwanted paint to be gone. |
| | |
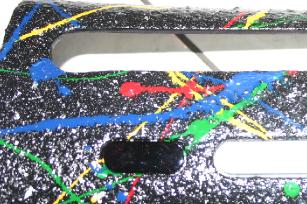
| | Here's the drive opening again. After sanding it, use a black permanent marker to dress the inside edge, or don't, your call. |
| | |
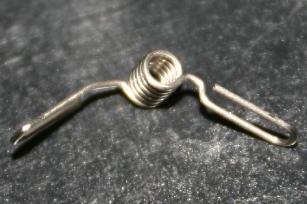
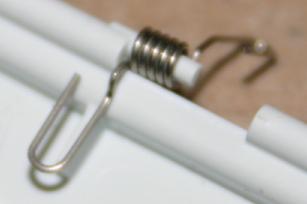
| | Now we put the doors back on. Here's one of the springs, note how they are designed and will only work one way because of a particular bend in the metal. |
| | |
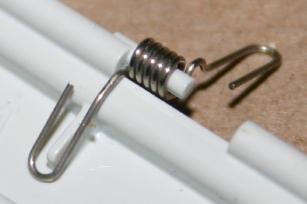
| | Here's how it should be installed to the memory card door. |
| | |
| | Here's how it SHOULDN'T be installed. |
| | |
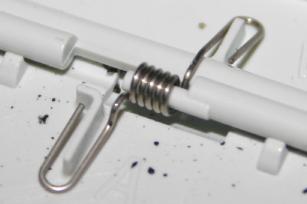
| | Partially tension the spring and pop the memory card doors in place. The spring should rest like the picture. |
| | |
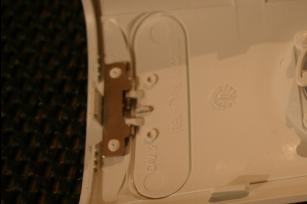
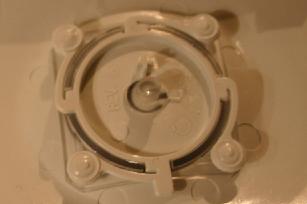
| | This is a before picture of the USB door with the metal plate that holds the spring in place. Putting this back together is trickey. The next pict below is how I held it in place during reassembly. |
| | |
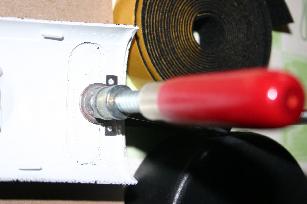
| | Using a light duty c-clamp, the metal plate was held in place after installing the door and spring. Each plastic stud was hit with a drop of epoxy. I let this set for about 1/2 hour. To keep from marring the front of the faceplate, some felt was put on the c-clamp face. The clamp is tightened JUST enough to hold everything together until the epoxy hardens. |
| | |
| | Another before picture to illustrate an after. When you install the other parts that were 'riveted' in, mix up a small dose of epoxy. Apply a small drop to bond the post to the part. You don't need much. Better too little than too much. As mentioned earlier, note how tall the applied epoxy drop is. After they harden, you can use some 120 sandpaper to slim up the drop. I discovered this clearance issue when I first put everything back together, the faceplate didn't fit right. It was these epoxy drops. Sanding them a tad did the trick! |